Deploying Enterprise Beans in Sun's J2EE Reference Implementation
by 
[Exercise |
API Docs |
Short Course|
Exercises]
Help is available for each task.
Task 1
Save the two jar files from the skeleton code section above into your working directory. You should execute the next step from that working directory.
Task 2
Start the deploytool utility. This runs an application for deploying enterprise beans into a running J2EE RI server.
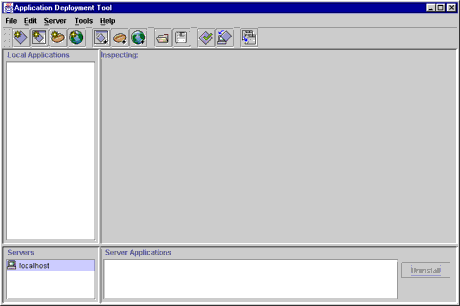
First make sure that your J2EE RI server and database server are running (this was explained in the first exercise. If they aren't, execute cloudscape -start and j2ee -verbose from the command-line. You will need the J2EE_HOME/bin directory in your PATH. Then you can run deploytool from the command-line. This should bring up the following screen:
Task 3
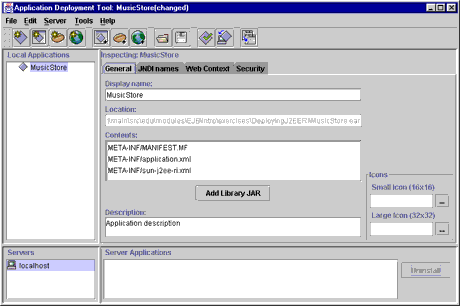
In deploytool, select "File/New Application..." to create a new application called "MusicStore" saved in a file called "MusicStore.ear".
The left-hand portion of the deploytool GUI should now show "MusicStore" as an application:
Task 4
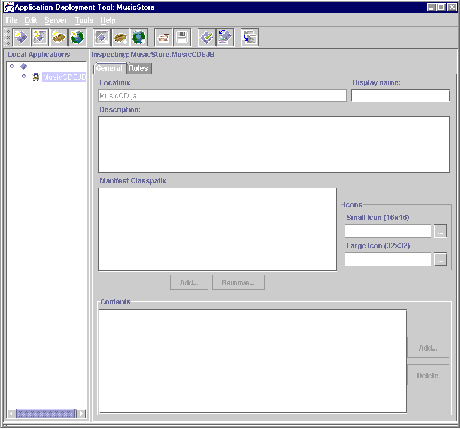
Select the MusicStore application from the list of deployed applications on the left-hand side of the deploytool GUI. Select "File/Add EJB JAR to Application..." and use the dialog box to open MusicCD.jar which is provided as as the skeleton code for this exercise.
The left-hand portion of the deploytool GUI should now show "MusicCDEJB" beneath the MusicStore application as shown here:
Task 5
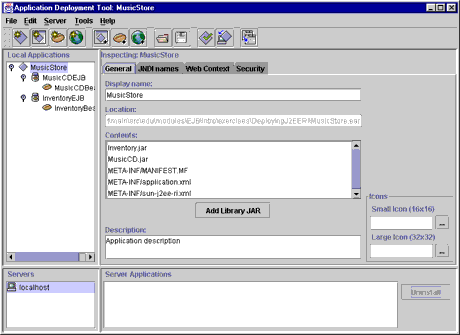
Follow the same procedure to add the Inventory.jar to the application.
The left-hand portion of the deploytool GUI should now show "MusicCDEJB" and "InventoryEJB" beneath the MusicStore application as shown here:
Task 6
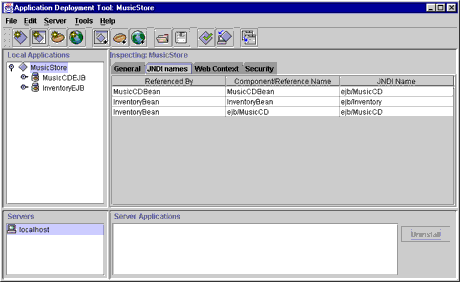
With the MusicStore application selected, choose the "JNDI" panel from the main portion of the deploytool window. Fill in the JNDI names for each component as shown:
| MusicCDBean | MusicCDBean | ejb/MusicCD |
| InventoryBean | InventoryBean | ejb/Inventory |
| InventoryBean | ejb/MusicCD | ejb/MusicCD |
You should see a list of three component with blank JNDI names. Fill in the names as shown here:
Task 7
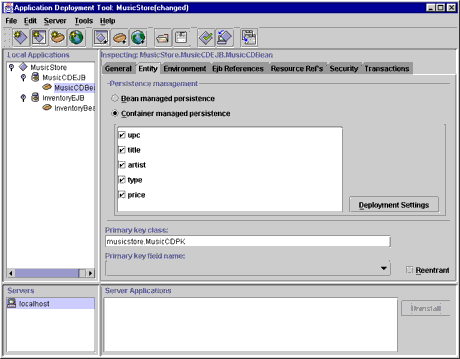
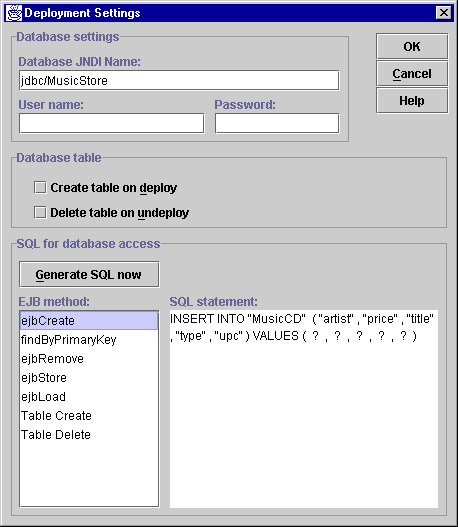
Now set up the database mapping for the MusicCD entity bean. You will have to select the "MusicCDBean" component from the left-hand window. Then select the "Entity" tab in the main window and press the "Deployment Settings" button to get the input dialog box. Set the database JNDI name to "jdbc/MusicStore" in this dialog, uncheck the boxes "Create table on deploy" and "Delete table on deploy", then press the "Generate SQL now" button.
The "Entity" tab will appear as follows:
jdbc/MusicStore is the JNDI name of the database you set up in the previous exercise. If deploytool complains about this database name, make sure you have completed the previous exercise properly and that the J2EE RI server has been restarted since then (so that it will pick up the database you created). After this is done, it should look something like this:
Task 8
The MusicStoreDB that you set up in the previous exercise uses a table called "MusicCD" to store the MusicCD beans. The SQL commands that the J2EE RI automatically generates does not use this exact table name, so you need to select each of the lifecycle methods and edit the SQL being generated for each to change them to operate on the MusicCD table.
See the help for the previous task to see what the screen should look like when you edit the SQL commands
Task 9
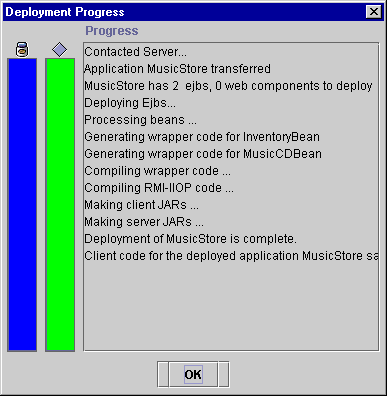
In deploytool, select "Tools/Deploy Application..." from the menu. Check the box to "Return Client Jar", otherwise just accept all the defaults and step through the wizard. Select the "Finish" button at the end.
After this is done, and if the deployment was successful, you should see a dialog something like this:
Task 10
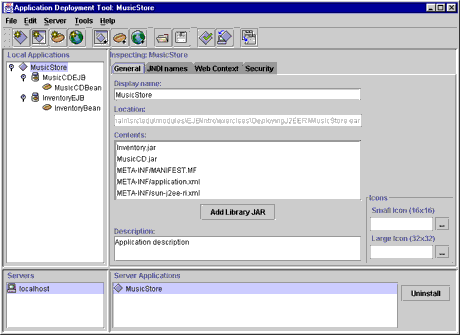
You should see MusicStore application show up in the lower section of the deploytool screen in the panel labeled "Server Applications". You have successfully deployed your beans!.
Note that the FCS version of J2EE RI has a bug that prevents the "Server Applications" panel to be initially shown. Use your mouse and drag the divider bar which appears along the bottom of the screen until this panel is visible. It should look something like this:
Copyright 1996-2000 jGuru.com. All Rights Reserved.